
Top Tips for Moving from Indoor to Outdoor Bouldering
Posted On: 12th March, 2025Fallen in love with bouldering indoors and wondering how to head outside and sample real rock for the first time, but unsure where to start? Look no further…
Bouldering outdoors opens up a world of opportunities both in the UK and abroad to explore some amazing locations and landscape, whilst retaining the social element that makes climbing walls such brilliant community hubs!
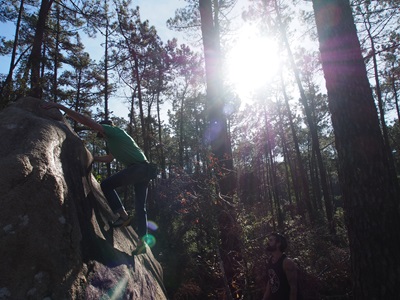
Dave Williams bouldering in Sintra, Portugal. Credit: Tiffa
What do I need?
If you’ve already been bouldering inside for a while, you’ll likely have at least a few bits of the kit required to get going outside - the great thing about bouldering is there is not a lot required to start out!
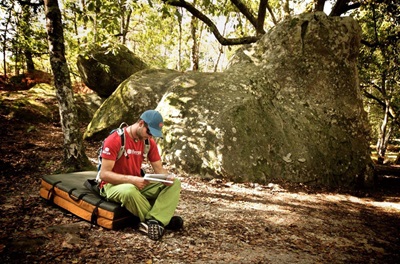
Stuart Honick pondering his next route in Font, France. Credit: The Peak Climbing School
Shoes - A pair of climbing shoes are essential to get yourself started, if you have not yet got yourself a pair, you can get a decent pair of comfortable shoes for around £60, make sure they are a nice tight fit (but not painful), as good footwork certainly becomes more vital on natural rock.
Bouldering pads - Essential to protect yourself when falling off and offer some protection afforded by the matting at your local bouldering wall! We always think the more pads the better!
Bouldering pads are the most expensive bit of kit you will need for getting outside. If you are unsure about dropping that much cash on a bit of kit and would like to try it out, why not hire one? We offer bouldering pad hire (Drop us an email or give us a call to reserve a pad for your bouldering adventures!) for £15 per pad per day - great for giving bouldering a go without spending too much or having to lug a pad around if space on your journey to the Peak District is limited!
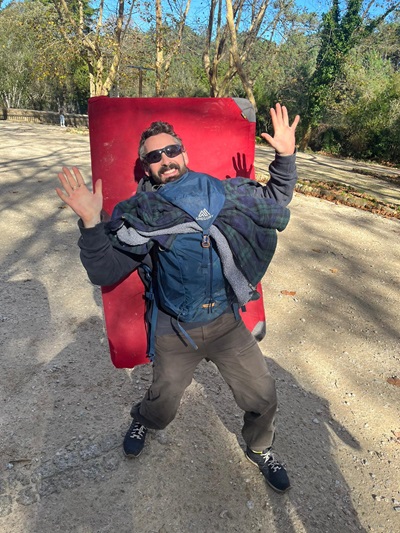
Chris 'Tiffa' Pearson demonstrating how to carry a bouldering pad and rucksack. Care is needed with this method! Credit: Dave Williams
Chalk & brush - Either a chalk bag or boulder bucket, plus a soft natural fiber bouldering brush is all you need.
Try to minimise your usage of chalk as much as possible when climbing on natural rock; if you do have to use it, gently brush away any excess chalk or tick marks from the rock once you are finished with that problem. If you are climbing on the southern sandstone, really try to avoid using any chalk if possible, and be very gentle when brushing away the chalk - respect the rock!
Old towel/ shoe mat - While bouldering outside, you will find your shoes usually get fairly muddy or gritty in between goes, especially if you have topped out and walked back round in your rock shoes. It is vital to clean and dry your shoes before making contact with the rock; an old towel, or a shoe mat is perfect for this. Many bouldering pads come with a built-in shoe scrubber, however it is always useful to have an old towel spare, as the scrubber will likely get wet quite quickly!
Guidebook/ App - Useful for finding some problems and crags in the area where you are planning on bouldering. Most guidebooks will cover everything you need to know to get to the crag, including where to park, and possible access restrictions - it is also worth checking on the BMC RAD app for the most up to date access status of any crags.
Top tips for getting started!
For your very first trip to the crag, there are a few things to consider before going straight in for the sends!
1. Find an experienced friend, local mountaineering club or hire an instructor
Your first trip outdoors is likely going to be potentially daunting: a new environment, limited padding in the event of a fall and a completely new climbing style using rock! Your local climbing wall is an invaluable resource for finding experienced people to head outside with for the first time and is often the meeting place for local climbing groups or mountaineering clubs, who can support your transition outdoors. If neither of these options work for you then joining an introductory course with an experienced instructor is a great way to upskill for the outdoors!
Our Intro Climbing Experience is the ideal starting point for anyone wanting to get a flavour of outdoor bouldering and climbing for the first time and learn skills to head out independently in the future. Or book a day’s Private Guiding for a tailored experience for yourself and your group!
2. Check out your descent
Getting to the top of a boulder problem is awesome, but if you can’t get down safely then your elation can be replaced quickly with despair! Unlike a lot of bouldering walls where you climb to the top and climb back down, outdoors it is common to climb on top of a boulder before descending- this is known as “Topping out”.
Before heading up a boulder, especially one that stands alone with no surrounding objects to assist your descent, it is a good idea to have a look for the best way to get back down before heading up! Sometimes the best way back down is to downclimb the easiest route up the boulder- we recommend climbing up part way and practicing downclimbing the easiest routes before moving onto the harder stuff or committing to topping out. Always downclimb as far as possible before contemplating jumping onto pads and have a spotter at hand to safeguard against an uncontrolled fall!
Down climbing can be practiced indoors too!
3. Practice topping out on the ground
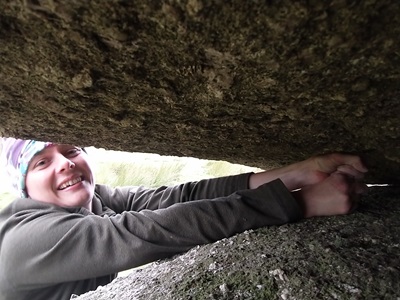
Getting on top of a boulder outdoors is sometimes the most difficult and often most risky part of any route! Practicing the technique of mantling on small boulders low to the ground can improve your safety and confidence. This technique is particularly relevant on the gritstone boulders of the Peak District.
The way I like to think of it is getting out of a swimming pool, which can include a knee, but trying to avoid a seal climbing onto a rock motion is best avoided where possible!
4. Falling and spotting
Falling off outdoors is often an intimidating and potentially hazardous proposition, where the thick, large area of indoor matting isn’t present.
Placing mats in the most useful locations is essential and doubling up pads over particular hazards such as rocks and other hard objects is often a good idea. However, going too high can form a precious leaning tower of Pisa, which is normally counter productive! Having climbing partners around to move pads according to directions of travel on a route can help reduce risk and increase your confidence. Make sure to avoid gaps between multiple pads on the ground that can result in twisted ankles or worse!
When it comes to falling off or jumping off if you aren’t able to down climb, you should be aiming to target the landing zone of mats as best as you can where the pads can help reduce the force on your body. Bending your knees, not tensing your muscles and rolling your weight onto the pad is best practice whether indoors or outside!
The role of spotter can be vital. Their job is to guide, not catch, a falling climber onto the pads, they are also in charge of giving encouragement and psyche when things get hard! Keeping hands up and ready is good to respond to an unexpected slip and targeting just above the waist enhances your ability to control a climber's centre of mass to enable them to land upright and not on their head and neck! When positioning yourself as a spotter look at the most likely direction of fall and also where the highest consequence fall zone would be!
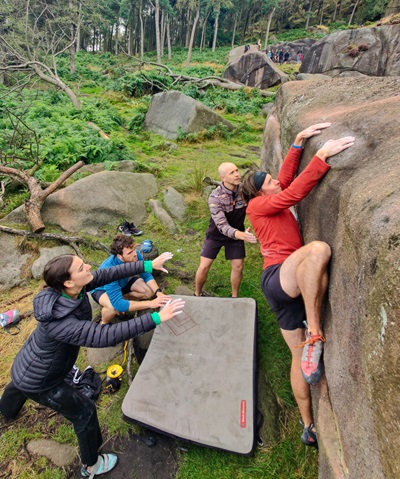
A group on one of our Intro Climbing Experiences trying Green Traverse at The Roaches. Credit: The Peak Climbing School.
Bonus tip: Try to spot with your thumbs pointing down when holding your hands out in front of you, this enables your hand to rotate rather than your thumbs bending back in the event of directing a falling climber. This reduces the risk of dislocating a thumb!
5. Start easy and grades
Outdoor bouldering grades can be a real knock to your confidence compared to the grades you will normally be expecting to climb indoors. On rock, the holds can be smaller, far less obvious and friction can vary greatly depending on the type of rock you are climbing on! For example if you are climbing V4 indoors you may find that some of the V1 and V2’s will be throwing you off. Dialling back your expected route difficulty to start is not something to feel disheartened about, as climbing on rock will help improve your overall technique as a climber!
Grades and grading systems don’t translate directly from indoors to outdoors. You won’t find mild, hot, very hot and spicy grades in a guidebook, which you might find in a climbing wall!
Most bouldering areas in the UK use the Font or V grading system.
An overlooked part of outdoor bouldering is warming yourself up, the walk up to the crag usually works as a bit of a pulse raiser, make sure you do plenty of dynamic stretches before pulling on, and start easy. Plenty of warm layers and a thermos of hot tea will help you maintain a good body temperature between attempts at a problem!
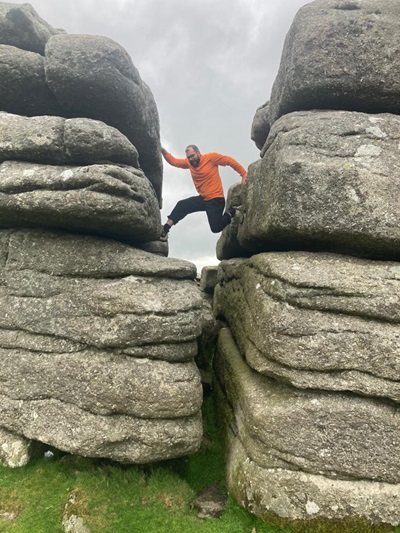
Frances Kenyon using a double fist jam on a V0 boulder on Dartmoor, Devon. Not a technique you often find indoors! Credit: The Peak Climbing School.
6. Route reading on rock
As we have mentioned earlier, identifying holds for both hands and feet can be a real challenge when first stepping outdoors. Most popular climbing areas have a slight discolouration where previous climbers have placed hands and feet, which can provide vital clues when attempting a route. There may well be experienced climbers around too and as at the wall they can provide information otherwise known as ‘Beta’ on how best to tackle a problem to support the description and photo in a guidebook.
Remember when outdoor bouldering and climbing we don’t have to be blinkered to limited holds as indoors, pretty much everything we can reach has the potential to be a useful hold!
7. In our feet we must trust!
The Peak Climbing School is blessed to be based beneath some of the best climbing in the UK and in our opinion maybe the world! The rock type we most frequently climb on is gritstone, which offers a texture similar to sandpaper but sometimes limited good handholds. Tackling routes on a gritstone sets a new level of challenge for your footwork! Developing confidence, precision and pressure application are critical when smearing on slabby problems and balancing on pebbles isn’t uncommon. No matter which rock type you start climbing on outdoors, then footwork will be the foundation of any ascent of any route. This can be developed indoors at your local climbing wall and starting to smear on the wall and ulitise small holds effectively can really smooth your transition to real rock!
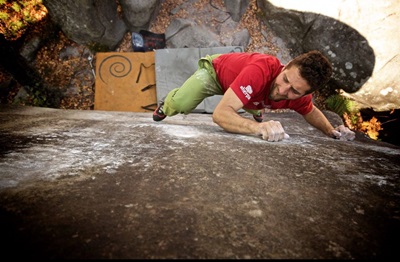
Stuart Honick crimping hard at Font, Frances. Credit: The Peak Climbing School.
8. Give your skin some love!
The coarseness and texture of rock varies from type to type. But be prepared to feel its effects much sooner when outdoors, compared to indoors - particularly on gritstone, granite and gabbro! You may find your fingers and hands feel tender and sore within a few problems, so emphasise rests and make every attempt count! Your hands and finger tips will harden up in time!
- Tape can buy you sometime and protect areas where skin grows thinly.
- Using a file removes excess coarse skin that can fold and create pressure points or tear.
- Specialised hand cream helps maintain skin for your next day, especially important on multi-day trips
9. Respect the Rock and the environment
- Always check the RAD (Regional Access Database) App, as this will have the latest up to date information on bird nesting restrictions, any landowner access issues or other problems such as potential loose rock that are best avoided!
- Check the weather - If the forecast suggests it will rain or has rained in the days/ hours prior to your visit to a climbing area, it is worth checking if the rock is dry before attempting to climb on it! If rock is wet or damp it shouldn’t be climbed on, as this increases the speed of erosion, especially on Gritstone or Sandstone. If climbing on the southern sandstone, it is best to wait a couple of days after downpour, as the rock is very fragile the day following rain.
- Clean your feet - Cleaning your shoes before each attempt is essential for two reasons - firstly, clean shoes will increase the area of contact between the rubber and the rock, any bits of grit or mud on the shoe can cause your foot placements to slip. Secondly mud and wetness getting on the rock again causes faster erosion of the holds, slowly making the problems harder than they once were!
- Leave the crag as you found it, if not better! Remove excess chalk marks gently with a soft brush, take all rubbish home with you and poop and pee responsibly!
- Now outdoor bouldering is growing in popularity, parking has become a contentious issue, so it is vital to use the information provided on RAD and a guidebook to ensure you park responsibly and respectfully. Not doing so, ie at The Roaches for instance will result in a parking fine!
- Respect other crag users, fellow outdoor people (walkers and roped climbers) and local residents. Loud music, blocking paths with pads and letting your dog run wild is not cool!
Tiffa respecting the route post-send in Sintra, Portugal. Credit: The Peak Climbing School.
10. Where is a good crag to start in the Peak District?
The Roaches
- Easily accessible, friendly landings, and our local crag at the Peak Climbing School…
The Roaches is a great place to start your outdoor bouldering journey. The lower tier boulders can be reached within around a ten minute walk, and can provide you with a great introductory circuit to bouldering. Practice your footwork on the easiest angled slabs to begin with - just beyond the gate before the main lower tier boulders lies a nice low-angled boulder (not in the guidebook) - practice finding your feet on this slab! Moving your way up into the lower tier, another great area to hit is Pine Tree Slab and then further on to delights of Blister Slab.
Burbage South Valley
- Easily accessible, grassy landings and plenty of routes at the lower grades to go at!
The valley boulders provide some of the most accessible and friendly problems in the eastern Peak District. It is a paradise for beginners! The landings are generally flat and grassy if not a little boggy and nothing gets too high. The routes mix slabs with some rounded arêtes and some more challenging gentle overhangs to provide a bigger challenge when needed. The area is family friendly and catches plenty of sun when it's out!
Summary
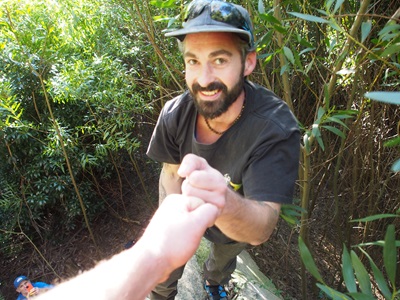
Joe Cresswell wishing he'd checked his descent! Credit: Frances Kenyon.
- Bouldering outdoors takes a while to get used to, so drop your grades and pick problems with friendly landings that aren’t too high, practicing moving on rock.
- Respect the rock and environment. If the rock is damp/ wet please don’t climb on it!
- Venture out with an experienced friend, join a local club/ group or find an instructor to support your journey.
- Always check out your descent, practice down climbing, manage pad placement and actively spot a climber at all times.
- Refine your footwork, learn to read the rock and practice topping out on low boulders.
Jargon Buster
Tick mark- The use of chalk to mark a potentially useful hold for your feet or hands.
Top out- A route where you’re required to climb onto a boulder rather than down climb back to the ground.
Spotting- The process of standing on the ground in a useful position around a route being climbed, whilst being prepared to use your hands and arms to control the descent of a falling climber.
Approach- The route used to access a climbing area.
Send- Successfully climbing a route/ problem.
Where can I find more information?
Please feel free to just us an email to info@peakclimbingschool.co.uk! We will be happy to help with bouldering pad rental, instruction and coaching plus another queries you may have!
Share this Article
Recent Blog Posts

D of E Kit List: The Ultimate Packing Guide
Posted: 16th February, 2025 Read Article
Sintra- Bouldering Destination Guide
Posted: 21st January, 2025 Read Article
What to Pack for a Climbing Course: An Essential Kit List
Posted: 14th January, 2025 Read Article