
D of E Kit List: The Ultimate Packing Guide
Posted On: 16th February, 2025
Photo Credit: Lyon
The Duke of Edinburgh (DofE) expedition is a challenging yet highly rewarding experience. To help make your preparation smooth and stress-free, we’ve put together a comprehensive packing list for participants and their parents or guardians.
It’s easy to think that a successful expedition requires expensive equipment. While high-end gear is often more durable and comfortable, it’s not essential. Most of the necessary items can be found at home or purchased as affordable alternatives that will still do the job.
To guide you, our DofE instructing team has put together expert tips to ensure your kit has all the essential features. If you’re booked on one of our expeditions, our team is available seven days a week to answer any questions that may arise.
Preparing for Your Expedition
Before packing, we highly recommend laying out all your gear on a bed, floor space, or table and methodically checking it off against the list below. This will help ensure that you don’t leave anything important behind or, equally, carry too much and make your rucksack heavier than it needs to be.
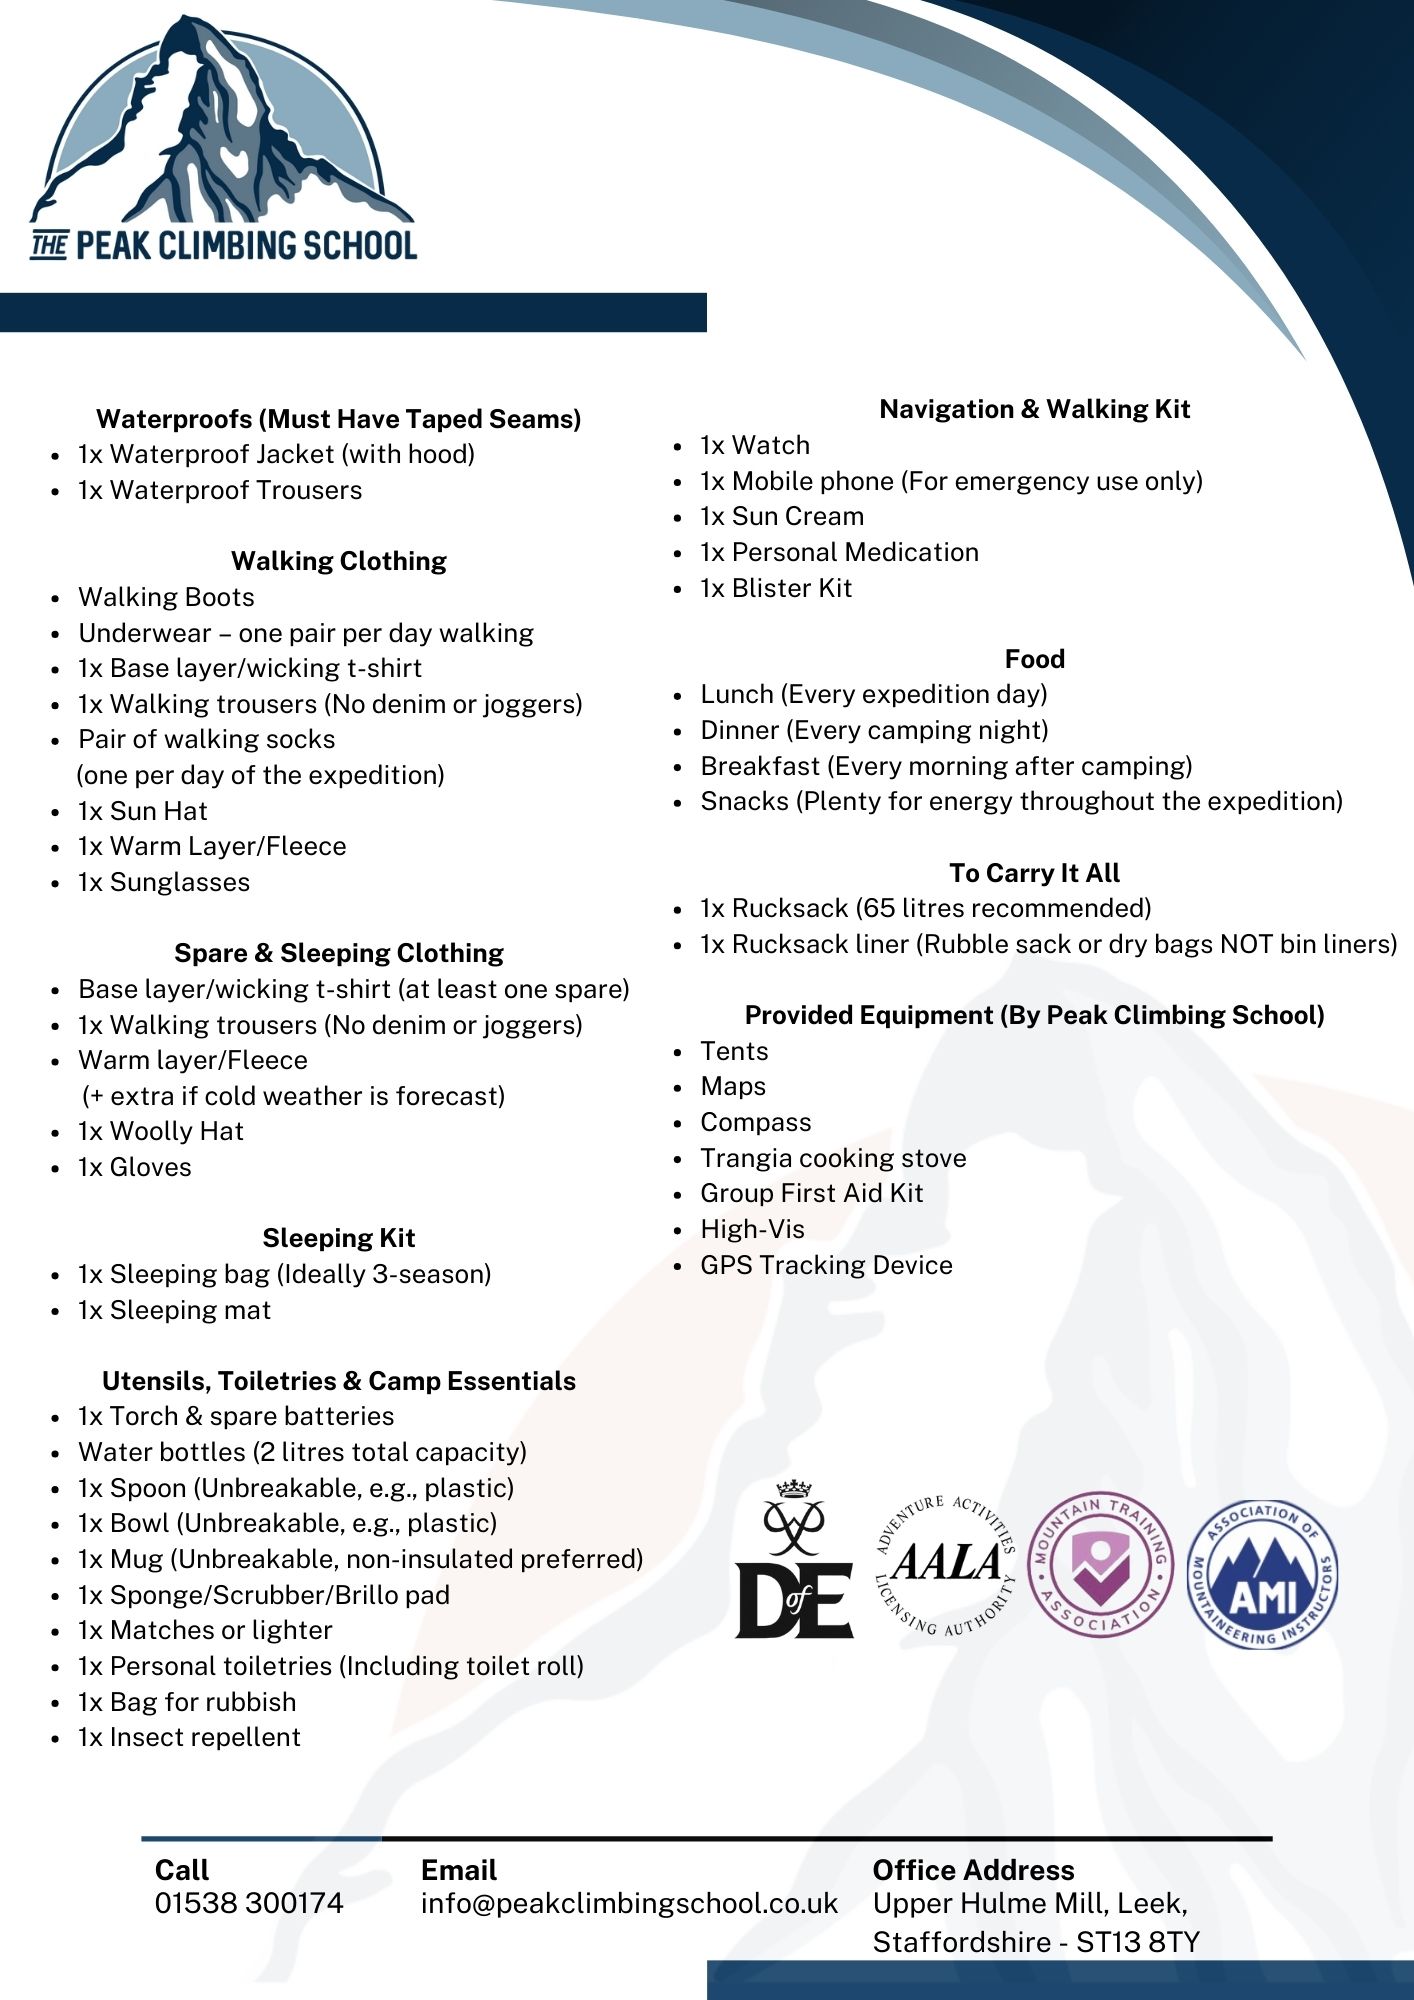
Tick List: What to Pack for Your DofE Expedition
[Downloadable photo at the end]
Waterproofs (Must Have Taped Seams)
- 1x Waterproof Jacket (with hood)
- 1x Waterproof Trousers
Walking Boots
- Worn-in, with good tread and ankle support
Walking Clothing
- Underwear – one pair per day walking
- 1x Base layer/wicking t-shirt
- 1x Walking trousers (No denim or joggers)
- Pair of walking socks (one per day of the expedition)
- 1x Sun Hat
- 1x Warm Layer/Fleece
- 1x Sunglasses
Spare & Sleeping Clothing
- Base layer/wicking t-shirt (at least one spare)
- 1x Walking trousers (No denim or joggers)
- Warm layer/Fleece (+ extra if cold weather is forecast)
- 1x Woolly Hat
- 1x Gloves
Sleeping Kit
- 1x Sleeping bag (Ideally 3-season)
- 1x Sleeping mat
Utensils, Toiletries & Camp Essentials
- 1x Torch & spare batteries
- Water bottles (2 litres total capacity)
- 1x Spoon (Unbreakable, e.g., plastic)
- 1x Bowl (Unbreakable, e.g., plastic)
- 1x Mug (Unbreakable, non-insulated preferred)
- 1x Sponge/Scrubber/Brillo pad
- 1x Matches or lighter
- 1x Personal toiletries (Including toilet roll)
- 1x Bag for rubbish
- 1x Insect repellent
Navigation & Walking Kit
- 1x Watch
- 1x Mobile phone (For emergency use only)
- 1x Sun Cream
- 1x Personal Medication
- 1x Blister Kit
Food
- Lunch (Every expedition day)
- Dinner (Every camping night)
- Breakfast (Every morning after camping)
- Snacks (Plenty for energy throughout the expedition)
To Carry It All
- 1x Rucksack (65 litres recommended)
- 1x Rucksack liner (Rubble sack or dry bags—NOT bin liners)
Provided Equipment (By Peak Climbing School)
- Tents
- Maps
- Compass
- Trangia cooking stove
- Group First Aid Kit
- High-Vis
- GPS Tracking Device
Expert Gear Advice & Tips
Waterproofs: Your Shield Against the Elements
Your waterproofs do more than keep you dry—they act as windproof layers too! While high-end brands like Gore-Tex and Arc'teryx offer breathable materials, the most important feature is that your jacket and trousers are truly waterproof. Look for:
- Taped seams to prevent water from seeping in.
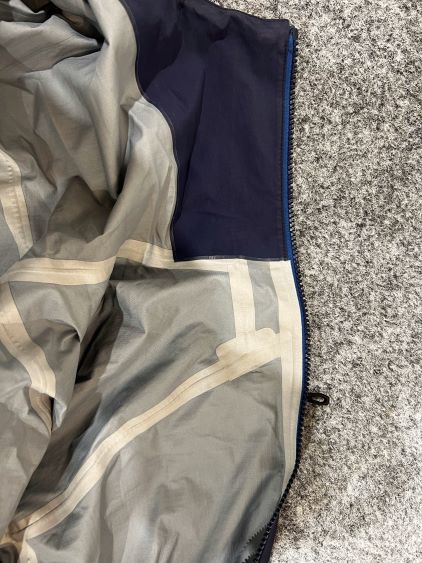
An example of taped seams on the inside of a waterproof jacket.
Photo Credit: Peak Climbing School
- Non-insulated jackets, as insulation can get waterlogged.
- A hood—because even the best jackets are useless without one!
- Longer jackets to overlap your trousers and keep you fully covered.
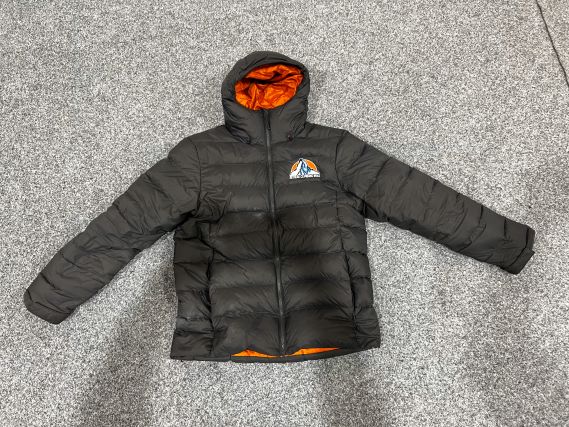
Even if the material is waterproof, because of the stitching puffy jackets are not, they need a waterproof jacket over them.
Photo credit: Peak Climbing School
Boots: Your Foundation for Success
Your boots don’t need to be the most expensive, but they do require some essential features:
- Choose boots that fit well—try on multiple pairs to find the right match.
- Ensure they’re waterproof and have deep, rugged treads.
- Break them in before your expedition to prevent blisters.
- Ankle support is crucial for rough terrain.
- Make sure they’re in good condition—broken boots can ruin an expedition!
Walking Clothing: Layering for Comfort
Base Layers:
Clothing against the skin must be either wool or synthetic. These materials wick moisture away, reducing heat loss. Cotton holds moisture and gets cold, so avoid it.
- Bring one t-shirt or long-sleeve top per day; they can double as sleepwear.
- Fleece/insulated jacket – Essential for warmth and moisture management.
- Walking trousers & leggings – Quick-drying materials work best. No jeans or fleecy joggers! They absorb water and become heavy, uncomfortable and will make you cold.
Walking Socks:
- Specialised walking socks provide extra padding and prevent blisters.
- They should be long enough to protect your ankles from your boots.
- Carry one pair per expedition day—dry socks help keep feet warm and blister-free.
Sunhat & Sunglasses: Essential for keeping the sun off your head in hot conditions or the rain out of your eyes.
Hat & Gloves: Useful, even in summer evening where the temperature can still drop.
Suncream: The higher the SPF the better. Sweat resistant options are ideal.
Sleeping Kit: Rest is Key
After a long day walking there is nothing more important than a good night’s sleep, so it’s key to get the right setup.
Sleeping Bag: A 3-season bag is ideal as temperatures drop significantly at night even in summer.
- They can be filled with either a synthetic or down (feathers) material. A synthetic fill is generally cheaper and retains a greater amount of warmth if wet, however a synthetic sleeping bag is bulkier and heavier. A down fill is lighter, less bulky (more packable) and has a greater warmth value for its size, but is more expensive and performs poorly if wet so needs great care.
Sleeping Mat:
- Foam roll mats provide insulation, some comfort and are generally less expensive
- inflatable mats have extra padding so are more comfortable but have a higher cost and have a risk of being punctured so cannot be carried outside a bag
- If you use a foam matt and carry it outside the rucksack don’t put it in a bag as they often get torn and can litter up the countryside. If the matt gets wet you can simply put it under the ground sheet of the tent.
Dry Bags: Always pack your sleeping bag in a dry bag or rubble sack to keep it from getting wet.
Camp Essentials: The Little Things Matter
Headtorch: Hands-free lighting makes cooking straightforward and safer, as well as enabling you to navigate tents and other obstacles whilst going to the loo at night.
Utensils: Cutlery from home works well for use on an expedition, it doesn’t need to be super lightweight, camping specific spork.
- A metal fork and spoon work, but please don’t bring your family’s finest Silverware in case it gets lost or bent.
- Either a metal or plastic bowl and mug are perfect, but avoid anything that is breakable like ceramic and glass.
Matches/Lighter: Long handled cooking matches work well for lighting your stove, but make sure they are stored in a plastic zip lockbag to keep them dry!
Navigation & Safety
Watch: Helps with timing your routes and tracking progress. A stopwatch feature is ideal.
Personal Medication: Keep easily accessible in your rucksack’s top lid pocket.
Packing & Carrying Your Gear
Rucksack- Recommended 65 litre capacity
Rucksacks come in all shapes and sizes, but there are few key things to think about:
- Make sure the rucksack fits your back length, this is often noted on the rucksack and relates to the length of your back. This dictates where the rucksack sits on your body and reduces the risk of load related aches and pains particular at the hips and shoulders.
- Minimum rucksack size of 65 litres. It needs to be big enough for everything to go inside including all of your group equipment i.e. tent, stove etc. The only exception that can go on the outside is a foam roll mat. Anything on the outside will potentially get wet, dirty or damaged by sharp objects like fencing, branches and brambles!
- It must have a waist strap and ideally a chest strap
- Top entry, travel style rucksacks that open by unzipping all the way round are impractical on expedition
- A top lid pocket is important for medication and quick access essentials.
Dry bags and waterproof liners
Dry bags made from a waterproof material with a roll top that keep items inside dry. Available from most outdoor shops and sports stores. Cheaper options are available!
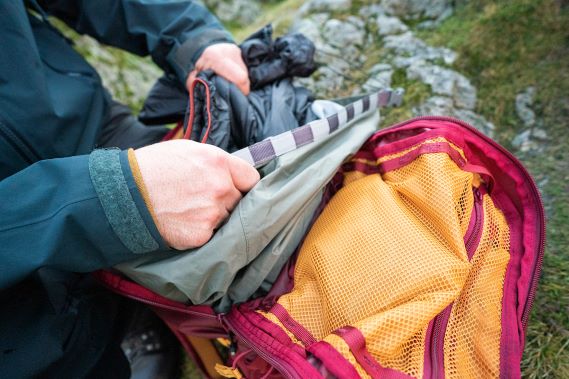
Photo Credit: Lyon
If the weather turns wet and windy it doesn’t matter if your rucksack has a waterproof cover there is a high likelihood water will get into your rucksack and soak your kit. It’s important to remember the following:
- Your rucksack must be lined with a large dry bag or a rubble sack (cheap to buy)
- Your sleeping bag must be in an individual drybag or rubblesack to keep it in. A wet sleeping bag equals a cold night’s sleep, as wet insulation reduces its insulating properties.
- Separate dry bags for clothes and other items make it easier to pack your rucksack and also find equipment later, plus keeping them dry if you open the rucksack if it’s raining!
Final Thoughts: Be Ready for Any Conditions
DofE expeditions are all about preparation and adaptability. By following this checklist and expert tips, you’ll be set up for success—comfortable, dry, and ready to take on any challenge.
Got questions about gear or expedition prep? Reach out to Peak Climbing School on [Facebook], [Instagram], or via email—we’d love to help!
Happy adventuring!
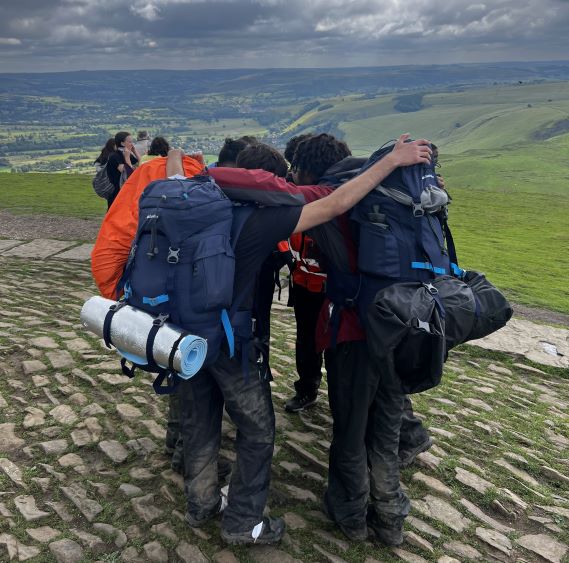
Photo Credit: Peak Climbing School
Share this Article
Recent Blog Posts

D of E Kit List: The Ultimate Packing Guide
Posted: 16th February, 2025 Read Article
Sintra- Bouldering Destination Guide
Posted: 21st January, 2025 Read Article
What to Pack for a Climbing Course: An Essential Kit List
Posted: 14th January, 2025 Read Article